如果硬盘 IO 变慢,或者即使存在一些 IO 错误,但盘符还能识别,推荐使用 ddrescue 工具进行硬盘/分区的备份。
命令行语法
ddrescue 的命令行语法如下:
~# ddrescue [options] infile outfile [mapfile]
其中 infile 为待备份的硬盘/分区,outfile 为备份的目标文件或硬盘/分区,mapfile 为进度文件(文本文件),为支持随时中断/重启备份任务 mapfile 必须指定。
需要注意的是,接收备份数据的文件系统或硬盘/分区需要有足够大的空间以容纳备份数据。
常见的选项如下:
-d / --idirect,跳过操作系统页缓存;
-f / --force,接收备份数据的目标是硬盘/分区时需要,因为会覆盖目标设备;
-n / --no-scrape,跳过 scraping 阶段(参考后文);
-r / --retry-passes,设置重试次数;
执行备份
备份至文件系统的一般操作流程如下:
~# ddrescue -n /dev/sdb /mnt/backup/sdb.img /mnt/backup/rescue-file.log
...
~# ddrescue -d -r3 /dev/sdb /mnt/backup/sdb.img /mnt/backup/rescue-file.log
GNU ddrescue 1.22
Press Ctrl-C to interrupt
Initial status (read from mapfile)
rescued: 598996 MB, tried: 2847 kB, bad-sector: 2847 kB, bad areas: 287

     ipos:   78305 MB, non-trimmed:        0 B,  current rate:       0 B/s
     opos:   78305 MB, non-scraped:        0 B,  average rate:  33920 kB/s
non-tried:        0 B,  bad-sector:    2940 kB,    error rate:      56 B/s
  rescued:  598996 MB,   bad areas:      303,        run time:  4h 54m 19s
pct rescued:   99.99%, read errors:     5933,  remaining time:          0s
                              time since last successful read:      1m 20s
Finished
备份至硬盘/分区的一般操作流程如下:
~# ddrescue -f -n /dev/sdb /dev/sdc /mnt/backup/rescue-dev.log
...
~# ddrescue -f -d -r3 /dev/sdb /dev/sdc /mnt/backup/rescue-dev.log
GNU ddrescue 1.22
Press Ctrl-C to interrupt
Initial status (read from mapfile)
rescued: 598996 MB, tried: 2847 kB, bad-sector: 2847 kB, bad areas: 287

     ipos:   78305 MB, non-trimmed:        0 B,  current rate:       0 B/s
     opos:   78305 MB, non-scraped:        0 B,  average rate:     165 B/s
non-tried:        0 B,  bad-sector:    1174 kB,    error rate:     256 B/s
  rescued:  598997 MB,   bad areas:     1125,        run time:  2h 48m 18s
pct rescued:   99.99%, read errors:     6922,  remaining time:         n/a
                              time since last successful read:      8m 41s
Finished
将备份拆分为两个步骤的原因是为了在第一步以最快的速度备份数据,然后在第二步再慢慢折腾重试。
上述命令行由于指定了进度文件,因此可以随时中断命令的执行(每次命令执行可以指定不同的选项),ddrescue 的命令行输出,以及进度文件(mapfile)的结构可以参考 ddrescue 官方文档[2]。
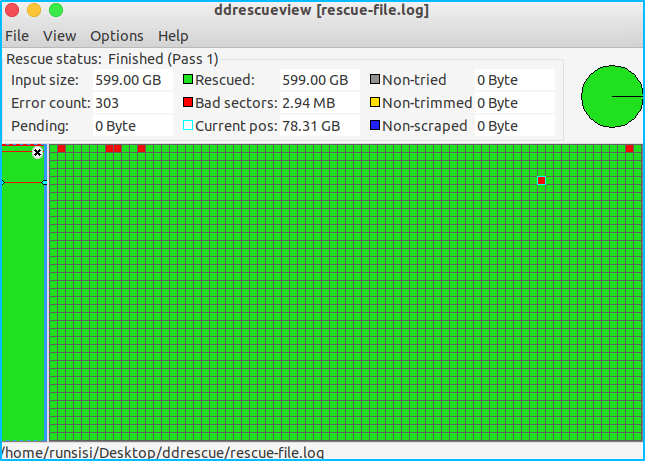
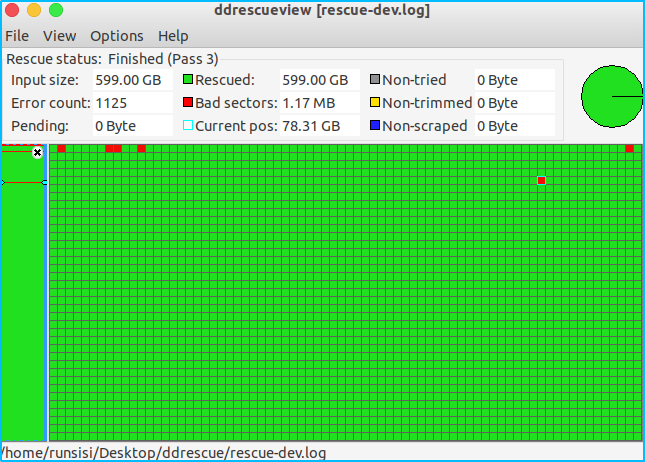
图形界面
进度文件可以通过图形界面工具 ddrescueview 进行查看,CentOS 下没有对应的 rpm 包,但可以在 Ubuntu 下有 deb 包:
~$ sudo apt install ddrescueview
查看的具体效果如下:
ddrescue 工作原理[2]
The algorithm of ddrescue is as follows (the user may interrupt the process at any point, but be aware that a bad drive can block ddrescue for a long time until the kernel gives up):
- Optionally read a mapfile describing the status of a multi-part or previously interrupted rescue. If no mapfile is specified or is empty or does not exist, mark all the rescue domain as non-tried.
- (First phase; Copying) Copying is done in up to five passes. The first pass reads the non-tried parts of the input file, marking the failed blocks as non-trimmed and skipping beyond them. The second pass delimits the blocks skipped by the first pass. The first two passes also skip beyond slow areas. The skipped areas are tried later in one or three additional passes (before trimming). The copying direction is reversed after each pass until all the rescue domain is tried.
The third and fourth passes read the blocks skipped due to slow areas (if any) by the first two passes, in the same direction that each block was skipped. For each block, passes 2 to 4 skip the rest of the block after finding the first error in the block. The last pass is a sweeping pass, with skipping disabled. The purpose of the multiple passes is to delimit large bad areas fast, recover the most promising areas first, keep the mapfile small, and produce good starting points for trimming.
Only non-tried areas are read in large blocks. Trimming, scraping and retrying are done sector by sector. Each sector is tried at most two times; the first in this phase as part of a large block read, the second in one of the phases below as a single sector read. - (Second phase; Trimming) Trimming is done in one pass. For each non-trimmed block, read forwards one sector at a time from the leading edge of the block until a bad sector is found. Then read backwards one sector at a time from the trailing edge of the block until a bad sector is found. Then mark the bad sectors found (if any) as bad-sector, and mark the rest of the block as non-scraped without trying to read it. If any edge is already adjacent to a bad sector, it is considered as already trimmed and is not trimmed again.
- (Third phase; Scraping) Scrape together the data not recovered by the copying or trimming phases. Scraping is done in one pass. Each non-scraped block is read forwards, one sector at a time. Any bad sectors found are marked as bad-sector.
- (Fourth phase; Retrying) Optionally try to read again the bad sectors until the specified number of retry passes is reached. The direction is reversed after each pass. Every bad sector is tried only once in each pass. Ddrescue can’t know if a bad sector is unrecoverable or if it will be eventually read after some retries.
- Optionally write a mapfile for later use.
When ddrescue finishes the steps above, any areas marked as bad-sector will remain untouched in the output file. If the output file is a regular file created by ddrescue, the areas marked as bad-sector will contain zeros. If it is a device or a previously existing file, the areas marked as bad-sector will still contain the data previously present there.
参考资料
[1] Disk cloning
https://wiki.archlinux.org/index.php/disk_cloning
[2] GNU ddrescue Manual
http://www.gnu.org/software/ddrescue/manual/ddrescue_manual.html
[3] Faster recovery from a disk with bad sectors
https://superuser.com/questions/905811/faster-recovery-from-a-disk-with-bad-sectors
[4] DDRescue taking months but no errors?
https://unix.stackexchange.com/questions/256930/ddrescue-taking-months-but-no-errors
[5] DRBL (Diskless Remote Boot in Linux)
https://gitlab.com/stevenshiau/drbl
[6] Clonezilla is a partition and disk imaging/cloning program similar to True Image® or Norton Ghost®
https://gitlab.com/stevenshiau/clonezilla
[7] TestDisk
https://www.cgsecurity.org/wiki/TestDisk
[8] PhotoRec
https://www.cgsecurity.org/wiki/PhotoRec
[9] Lzip
https://www.nongnu.org/lzip/manual/lzip_manual.html
[10] Lziprecover
https://www.nongnu.org/lzip/lziprecover.html
最后修改于 2019-02-28