搭建基于 SQLite 的 joplin server
服务端配置
构建 joplin server
$ cd /home/runsisi/runsisi.com/
$ git clone https://github.com/laurent22/joplin.git
$ cd joplin/packages/server/
$ npm install
$ npm run tsc
创建 joplin 用户
创建用户:
$ sudo useradd -M joplin -s /usr/sbin/nologin
并且为 joplin 用户添加 joplin/packages/server/ 目录访问权限:
$ cd ..
$ setfacl -m u:joplin:rwx server/
创建 systemd 服务
$ sudo vi /etc/default/joplin
APP_BASE_URL=https://joplin.runsisi.com
APP_PORT=8080
$ sudo vi /lib/systemd/system/joplin.service
[Unit]
Description=joplin
After=network.target

[Service]
EnvironmentFile=-/etc/default/joplin
ExecStart=/usr/bin/npm run start --prefix /home/runsisi/runsisi.com/joplin/packages/server/
ExecReload=/bin/kill -HUP $MAINPID
KillMode=control-group
Restart=on-failure
RestartPreventExitStatus=255
Type=simple
User=joplin
Group=joplin

[Install]
WantedBy=multi-user.target
数据默认使用 SQLite 进行存储,DB 路径为(路径是代码中写死的,因为 joplin 默认 SQLite 数据存储仅用于开发、测试环境,虽然我个人认为对于个人用户而言 SQLite 已经足够了):
$ ll db-prod.sqlite
-rw-r--r-- 1 joplin joplin 786432 Apr 18 21:45 db-prod.sqlite
配置 nginx
$ sudo vi /etc/nginx/conf.d/runsisi.com.conf
server {
    listen 443 ssl;
    server_name joplin.runsisi.com;
    ssl_certificate /home/runsisi/runsisi.com/certs/joplin.runsisi.com.crt;
    ssl_certificate_key /home/runsisi/runsisi.com/certs/joplin.runsisi.com.key;

    location / {
        proxy_pass http://127.0.0.1:8080;

        proxy_set_header Host $host;
        proxy_set_header X-Forwarded-Proto https;
    }
}
启动 systemd 服务
$ sudo systemctl daemon-reload
$ sudo systemctl enable joplin
$ sudo systemctl start joplin
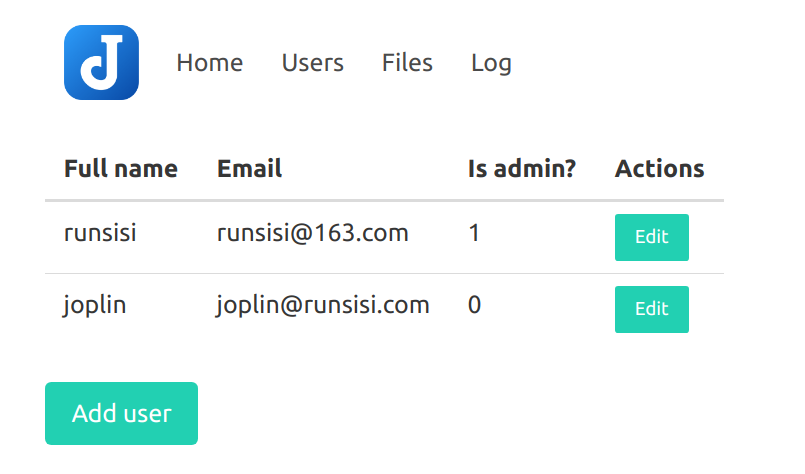
创建同步用户
访问登录页面:
https://joplin.runsisi.com/login

默认用户名、密码:
admin@localhost / admin
创建新的同步用户:
客户端配置
$ cd .config/
$ rm -rf @joplin/
$ rm -rf joplin-desktop/
启动:
Joplin-1.7.11.AppImage
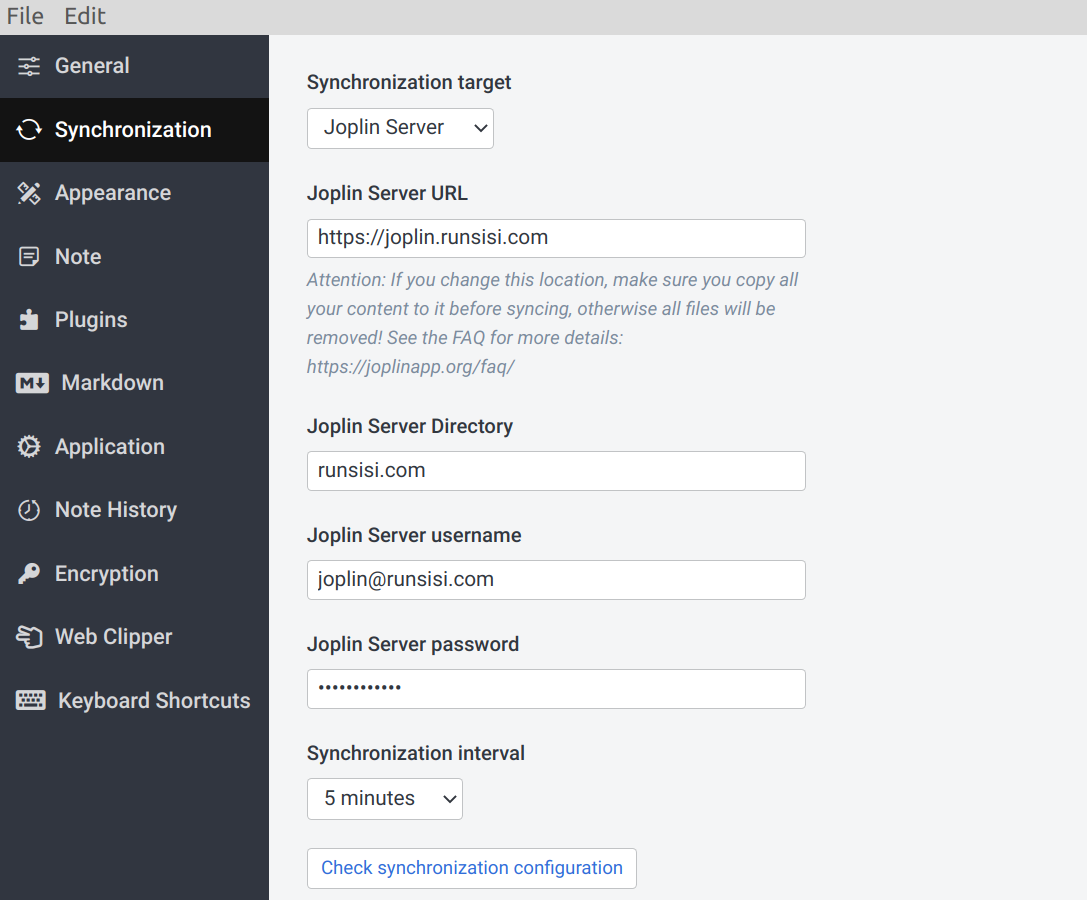
配置同步:
最后修改于 2021-06-21